If you’ve ever considered baking bread at home but felt intimidated by the process, you’re not alone. The good news is that you don’t need to be a professional baker to create warm, aromatic loaves in your own kitchen.
From quick, no-fuss recipes that take less than an hour to traditional methods that yield artisanal results, there’s a bread-making style that’ll match your comfort level and schedule. Whether you’re craving a crusty sourdough or a soft sandwich loaf, these ten foolproof recipes will help you master the basics while building your confidence as a home baker.
Understanding Bread Basics
Success in bread-making starts with mastering a few fundamental concepts. Whether you’re creating rustic sourdough or simple sandwich bread types, understanding basic techniques like proofing, kneading, and scoring will set you up for consistent results.
The fermentation process, which occurs when yeast interacts with flour and water, creates the foundation for your bread’s texture and flavor.
You’ll need to master proper measuring techniques, as baking requires precision for reliable outcomes. When measuring flour, use the spoon-and-level method rather than scooping directly with the measuring cup, which can lead to over-packing.
Temperature considerations play an essential role in your bread’s development – most yeasts activate best between 105-115°F (40-46°C), while your kitchen’s ambient temperature affects proofing time.
Before diving into any recipe, make certain you understand these essential terms: proofing refers to the dough’s rising period, kneading develops the gluten structure through folding and pressing, and scoring involves making deliberate cuts in your dough before baking to control expansion.
These techniques work together to create the perfect loaf, regardless of your chosen recipe.
Recipe Collection
You’ll discover five essential bread recipes that range from everyday staples to artisanal creations, including classic white sandwich bread, rustic no-knead loaves, and quick beer bread.
Whether you’re new to bread-making or an experienced baker, these foundational recipes form the cornerstone of home baking, with options like whole wheat brown bread and Italian focaccia rounding out your repertoire.
Each recipe has been carefully selected to help you master different techniques, from basic kneading to working with enriched doughs, while building your confidence in the kitchen.
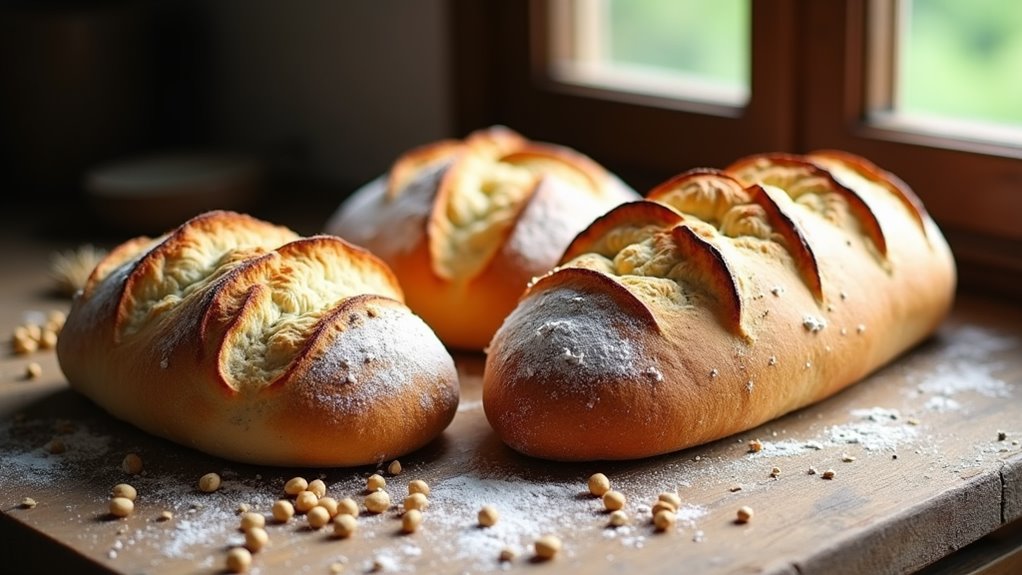
1. Classic White Sandwich Bread
Whether you’re new to bread-making or simply want a foolproof recipe, classic white sandwich bread serves as the perfect starting point.
You’ll need just five classic bread ingredients: all-purpose flour, active dry yeast, salt, sugar, and warm water. This recipe requires about 3 hours total, including 2 hours of rising time and 30 minutes of hands-on work using basic kneading techniques.
To begin, combine 1 tablespoon of yeast with 1 cup of warm water and 1 teaspoon of sugar, letting it sit until foamy.
Mix in 3 cups of flour, 1 teaspoon of salt, and 2 tablespoons of softened butter. Knead the dough for 8-10 minutes until smooth and elastic. Let it rise in a warm spot for 1 hour, then shape into a loaf and place in a greased 9×5 inch pan.
Allow a second rise for 45 minutes before baking at 375°F for 30-35 minutes.
Store your finished bread in an airtight container at room temperature for up to 4 days, or freeze for up to 3 months. Slice only when completely cooled to maintain freshness.
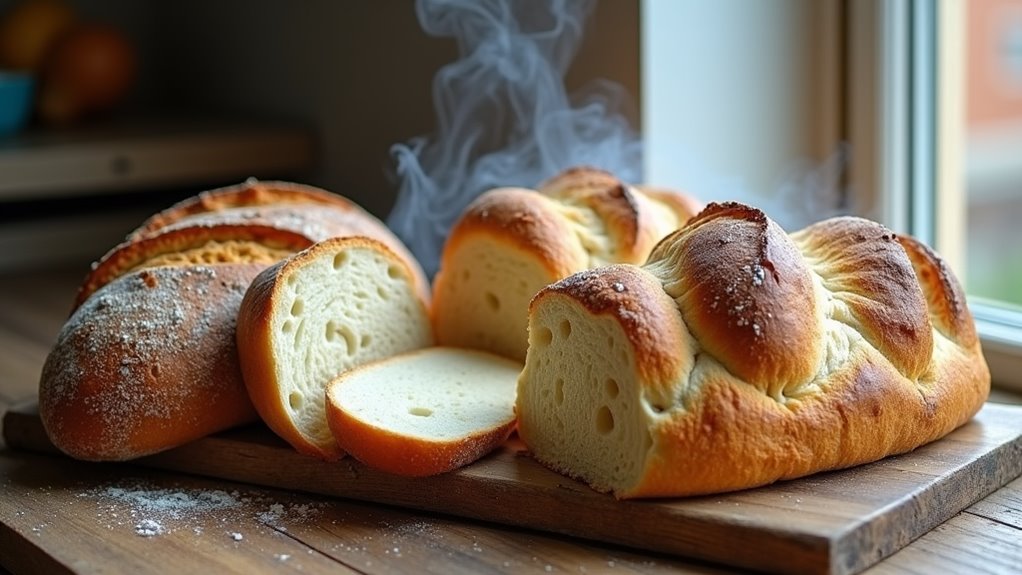
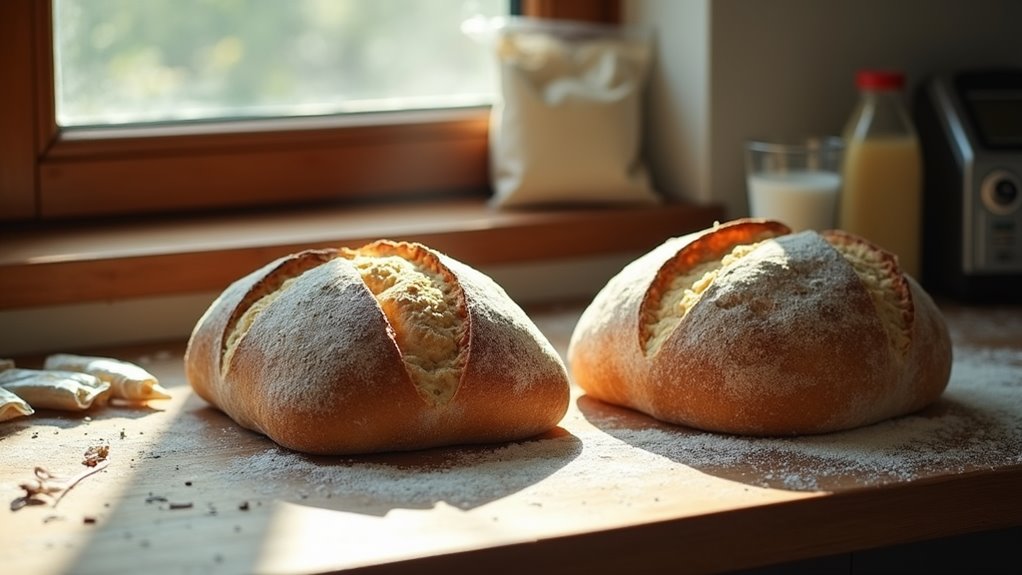
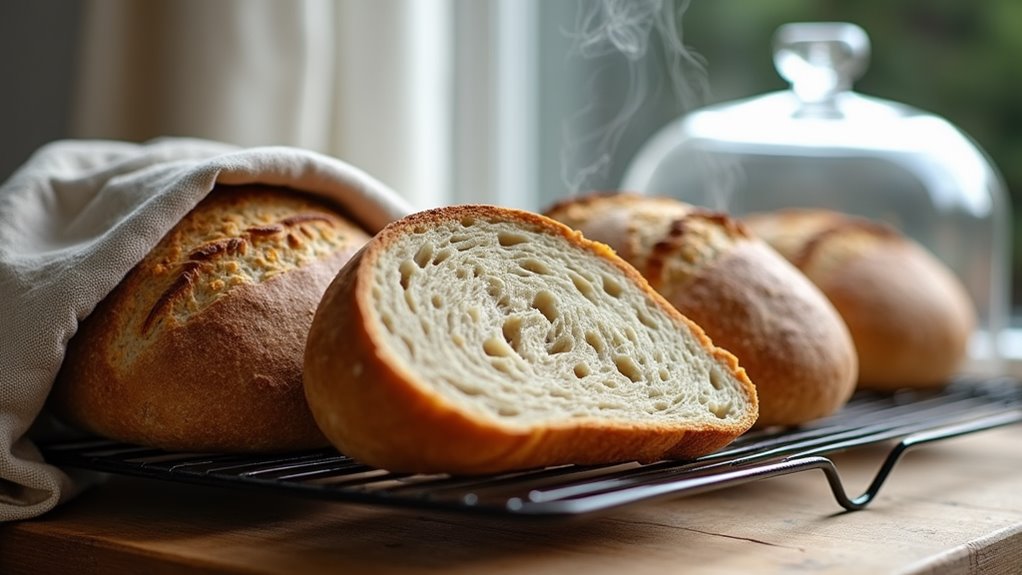
2. No-Knead Artisan Bread
No-knead artisan bread revolutionized home baking when it first appeared in the New York Times in 2006. This effortless technique produces bakery-quality results with just flour, water, salt, and yeast, making it perfect for beginners who want professional results without complicated steps.
The long, overnight fermentation process develops complex flavors and creates the perfect texture, all while you sleep.
You’ll discover that the no-knead technique relies on time rather than effort, with an 18-24 hour fermentation that develops gluten naturally. The dough rests in a covered bowl at room temperature, requiring just one quick fold before baking.
When it’s time to bake, you’ll use a preheated Dutch oven to create that signature crackling crust and tender interior.
Once you’ve mastered the basic recipe, try artisan variations by incorporating different flour blends, seeds, or dried fruits. You can experiment with whole wheat, rye, or spelt flour, or add ingredients like rosemary, olives, or walnuts.
The possibilities are endless, and each loaf will have that authentic artisanal appearance with minimal hands-on time.
3. Quick Beer Bread
Beer bread offers a delightfully simple alternative to traditional yeast-based recipes, requiring just five basic ingredients and no kneading or proofing time. The beer benefits include naturally activating the leavening process while adding complex, malty undertones to your finished loaf.
You’ll need only self-rising flour, sugar, salt, melted butter, and one 12-ounce bottle of beer to create this rustic bread.
While a basic lager works perfectly, you can explore endless flavor variations by choosing different beer styles. Dark stouts create a deeper, more robust taste, while wheat beers offer subtle notes of citrus and spice.
You can also enhance your bread by incorporating herbs, cheese, or diced jalapeños into the batter before baking.
Serve your beer bread warm from the oven, slathered with butter for a simple treat. It pairs wonderfully with hearty soups, stews, or chili, and makes excellent toast the next morning.
For best results, store your cooled bread in an airtight container at room temperature for up to three days, or freeze for up to two months.
4. Whole Wheat Brown Bread
Moving from beer-based breads to heartier options, whole wheat brown bread stands out as a nutritional powerhouse in home baking. The whole wheat nutrition profile includes higher fiber content, essential B vitamins, and minerals that you won’t find in refined white flour alternatives.
You’ll discover that mastering basic baking techniques for whole wheat bread requires understanding how the additional bran affects moisture absorption and gluten development.
For best results, you’ll want to combine three cups of whole wheat flour with one cup of bread flour, which helps achieve the right texture while maintaining nutritional benefits. The dough needs extra kneading time, typically 12-15 minutes, to properly develop the gluten structure.
If your dough seems too dry, you can add water one tablespoon at a time until it feels tacky but not sticky.
Storage becomes particularly important with whole wheat breads due to their natural oils. Keep your finished loaf in an airtight container at room temperature for up to three days, or slice and freeze for up to two months.
You’ll maintain freshness by wrapping the bread in parchment paper before storing.
5. Italian Focaccia
While many breads require extensive kneading, Italian focaccia delights bakers with its straightforward preparation and endless topping possibilities.
You’ll find that generous amounts of olive oil create the bread’s signature crispy crust and tender interior, making the choice of oil particularly important for authentic results.
The characteristic dimpling technique, created by pressing your fingertips into the dough before baking, forms small wells that capture herbs, oil, and other toppings.
Traditional herb toppings include rosemary, thyme, and oregano, but you can experiment with garlic, sun-dried tomatoes, olives, or even caramelized onions for unique variations.
When selecting oil choices, extra virgin olive oil offers the most traditional and robust flavor profile, though you can use lighter olive oil varieties for a more subtle taste.
You’ll want to brush the surface generously with oil both before and after baking to achieve that authentic Italian texture.
Serve your focaccia warm alongside pasta dishes, use it as a base for sandwiches, or present it as an appetizer with dipping oils and Mediterranean-inspired spreads.
6. Simple Dinner Rolls
Fresh dinner rolls can transform an ordinary meal into something special, and mastering a few basic recipes will serve you well for years to come.
You’ll discover that dinner roll variations are nearly endless, from classic butter-brushed beauties to herb-infused versions that complement specific main dishes.
When it comes to baking techniques, you’ll want to master the basic shaping method first: divide your dough into equal portions, form tight balls by pulling the edges underneath, and arrange them with slight spacing in your baking pan.
You can prepare these rolls ahead of time by shaping them and refrigerating for up to 24 hours before baking, making them perfect for busy schedules or holiday planning.
For the finishing touch, you’ve got several butter brush options: traditional melted butter creates a soft, golden crust, while honey butter adds subtle sweetness, and herb-infused butter introduces aromatic complexity.
If you’re planning far ahead, you can freeze the shaped, unbaked rolls for up to three months – just thaw overnight in the refrigerator before baking.
Once baked, your rolls will stay fresh at room temperature for two days when stored in an airtight container.
7. Cinnamon Raisin Bread
Cinnamon raisin bread brings the cozy comfort of a bakery right into your kitchen.
Before beginning, you’ll want to soak your raisins in warm water for 10-15 minutes, which prevents them from drawing moisture from your dough and guarantees they’ll stay plump during baking. You can substitute other dried fruits like cranberries, chopped apricots, or currants if you prefer a different flavor profile.
The key to achieving those beautiful swirls lies in the swirling technique: after rolling out your dough into a rectangle, spread your cinnamon-sugar mixture evenly, leaving a one-inch border along the edges. Roll the dough tightly from the short end, pinching the seams to seal before placing it in your loaf pan.
You’ll find this bread makes exceptional breakfast fare. Toast thick slices and spread them with butter, use them for French toast, or transform them into memorable sandwich bread for lunch boxes.
For best results, store your finished loaf in an airtight container at room temperature for up to three days, or slice and freeze for up to two months.
8. Irish Soda Bread
Unlike yeast breads that require lengthy proofing times, Irish soda bread relies on the chemical reaction between baking soda and buttermilk to create its signature rise. This traditional quick bread has deep roots in Irish baking history, emerging during the 1800s when baking soda became commercially available.
You’ll find that most family recipes share four basic ingredients: flour, salt, baking soda, and buttermilk.
While traditional Irish soda bread features a plain, rustic flavor profile, modern recipe variations incorporate ingredients like raisins, caraway seeds, or honey for added complexity. The texture differences between traditional and contemporary versions range from dense and crumbly to lighter and more cake-like, depending on your ingredient choices and mixing technique.
Beyond its cultural significance in Irish traditions, you’ll find this bread particularly popular during festive occasions like St. Patrick’s Day celebrations. You can serve it warm from the oven with butter and jam for breakfast, or alongside hearty stews and soups for dinner.
The cross scored on top isn’t just decorative – it’s traditionally believed to ward off evil and let the fairies escape, connecting you to centuries of Irish baking customs.
9. Basic Flatbread
Whether you’re a novice baker or seasoned chef, flatbreads offer one of the most versatile and approachable entry points into bread-making.
These simple yet satisfying breads require minimal ingredients – typically just flour, water, salt, and sometimes yeast – making them perfect for quick preparation when you’re short on time or ingredients.
You’ll find multiple cooking variations to suit your kitchen setup: griddle, stovetop, or conventional oven methods all work well for flatbreads.
For stovetop cooking, maintain medium-high heat and cook each side for 2-3 minutes until golden brown spots appear. In the oven, bake at 400°F (200°C) for 8-10 minutes for best results.
Once you’ve mastered the basic recipe, experiment with flatbread toppings to create diverse meals. Traditional options include herbs, olive oil, and sea salt, while modern variations incorporate za’atar, cheese, or caramelized onions.
Serve your flatbreads warm alongside Mediterranean dips like hummus or baba ganoush, use them as sandwich wraps, or cut them into triangles for dipping into soups and stews. They’ll stay fresh for 2-3 days when stored in an airtight container.
10. Beginner’s Sourdough
Moving from flatbread’s simplicity, sourdough baking offers an exciting next step in your bread-making journey.
Creating your own sourdough starter requires just flour, water, and patience as you cultivate the wild yeast and beneficial bacteria that power the fermentation process. You’ll need to feed your starter daily for about a week until it’s consistently doubling in size between feedings.
Plan your baking schedule around the starter’s development, allowing 24 hours for the initial dough fermentation and another 12-24 hours for proofing. You’ll know your starter is ready when it’s bubbly, active, and has a pleasant sour aroma.
Begin with a basic recipe using a 70% hydration ratio: 500g bread flour, 350g water, 100g active starter, and 10g salt.
When troubleshooting common issues, remember that temperature affects fermentation speed – warmer conditions accelerate the process while cooler temperatures slow it down. If your dough isn’t rising properly, check your starter’s activity and room temperature first.
For best results, maintain consistent feeding times and keep detailed notes about your starter’s behavior, allowing you to adjust future bakes accordingly.
Common Problems and Solutions
While making bread can be deeply rewarding, even experienced bakers sometimes encounter common issues that affect their results. When your bread isn’t rising properly, check your yeast’s freshness and verify your dough temperature stays between 75-85°F during proofing.
You’ll also want to confirm that you’re using the correct ratio of yeast to flour and allowing enough time for proper fermentation.
Dense bread typically results from insufficient kneading or under-proofing, so you’ll need to develop the gluten structure fully and give your dough adequate time to rise.
For uneven baking, rotate your loaf halfway through the baking time and confirm your oven maintains a consistent temperature throughout the process.
Crust problems often stem from incorrect moisture levels during baking. If you’re getting a pale, soft crust, try adding a pan of water to your oven for steam during the first 10-15 minutes of baking.
For an overly hard crust, you might be baking at too high a temperature or for too long. Adjust your oven temperature down by 25 degrees and monitor the baking time closely.
Storage and Freshness
To keep your homemade bread at its best, proper storage is essential. Following effective bread preservation methods will help maintain that fresh-baked taste and texture for days.
Store your bread at room temperature in a paper bag or bread box for 2-3 days, or wrap it tightly in plastic and refrigerate for up to a week.
For long-term storage, you’ll want to freeze your bread. Slice the loaf before freezing, wrap it tightly in plastic wrap, then place it in a freezer bag with the air pressed out. You can store frozen bread for up to three months, thawing slices as needed.
If your bread becomes stale, you can revive it by sprinkling it with water and heating it in a 350°F oven for 5-10 minutes. Don’t throw away bread that’s past its prime – transform it into breadcrumbs, croutons, or French toast.
Maintaining bread freshness is simple when you plan ahead: slice what you’ll use within two days, freeze the rest, and store in appropriate containers based on your timeline.
Remember that crusty artisan breads store differently than soft sandwich loaves, so adjust your storage method accordingly.